

First run
Joinery opens on a welcome tab. Nothing is configured yet and nothing is connected, so this tab is entirely made of doors.
The welcome tab
Section titled “The welcome tab”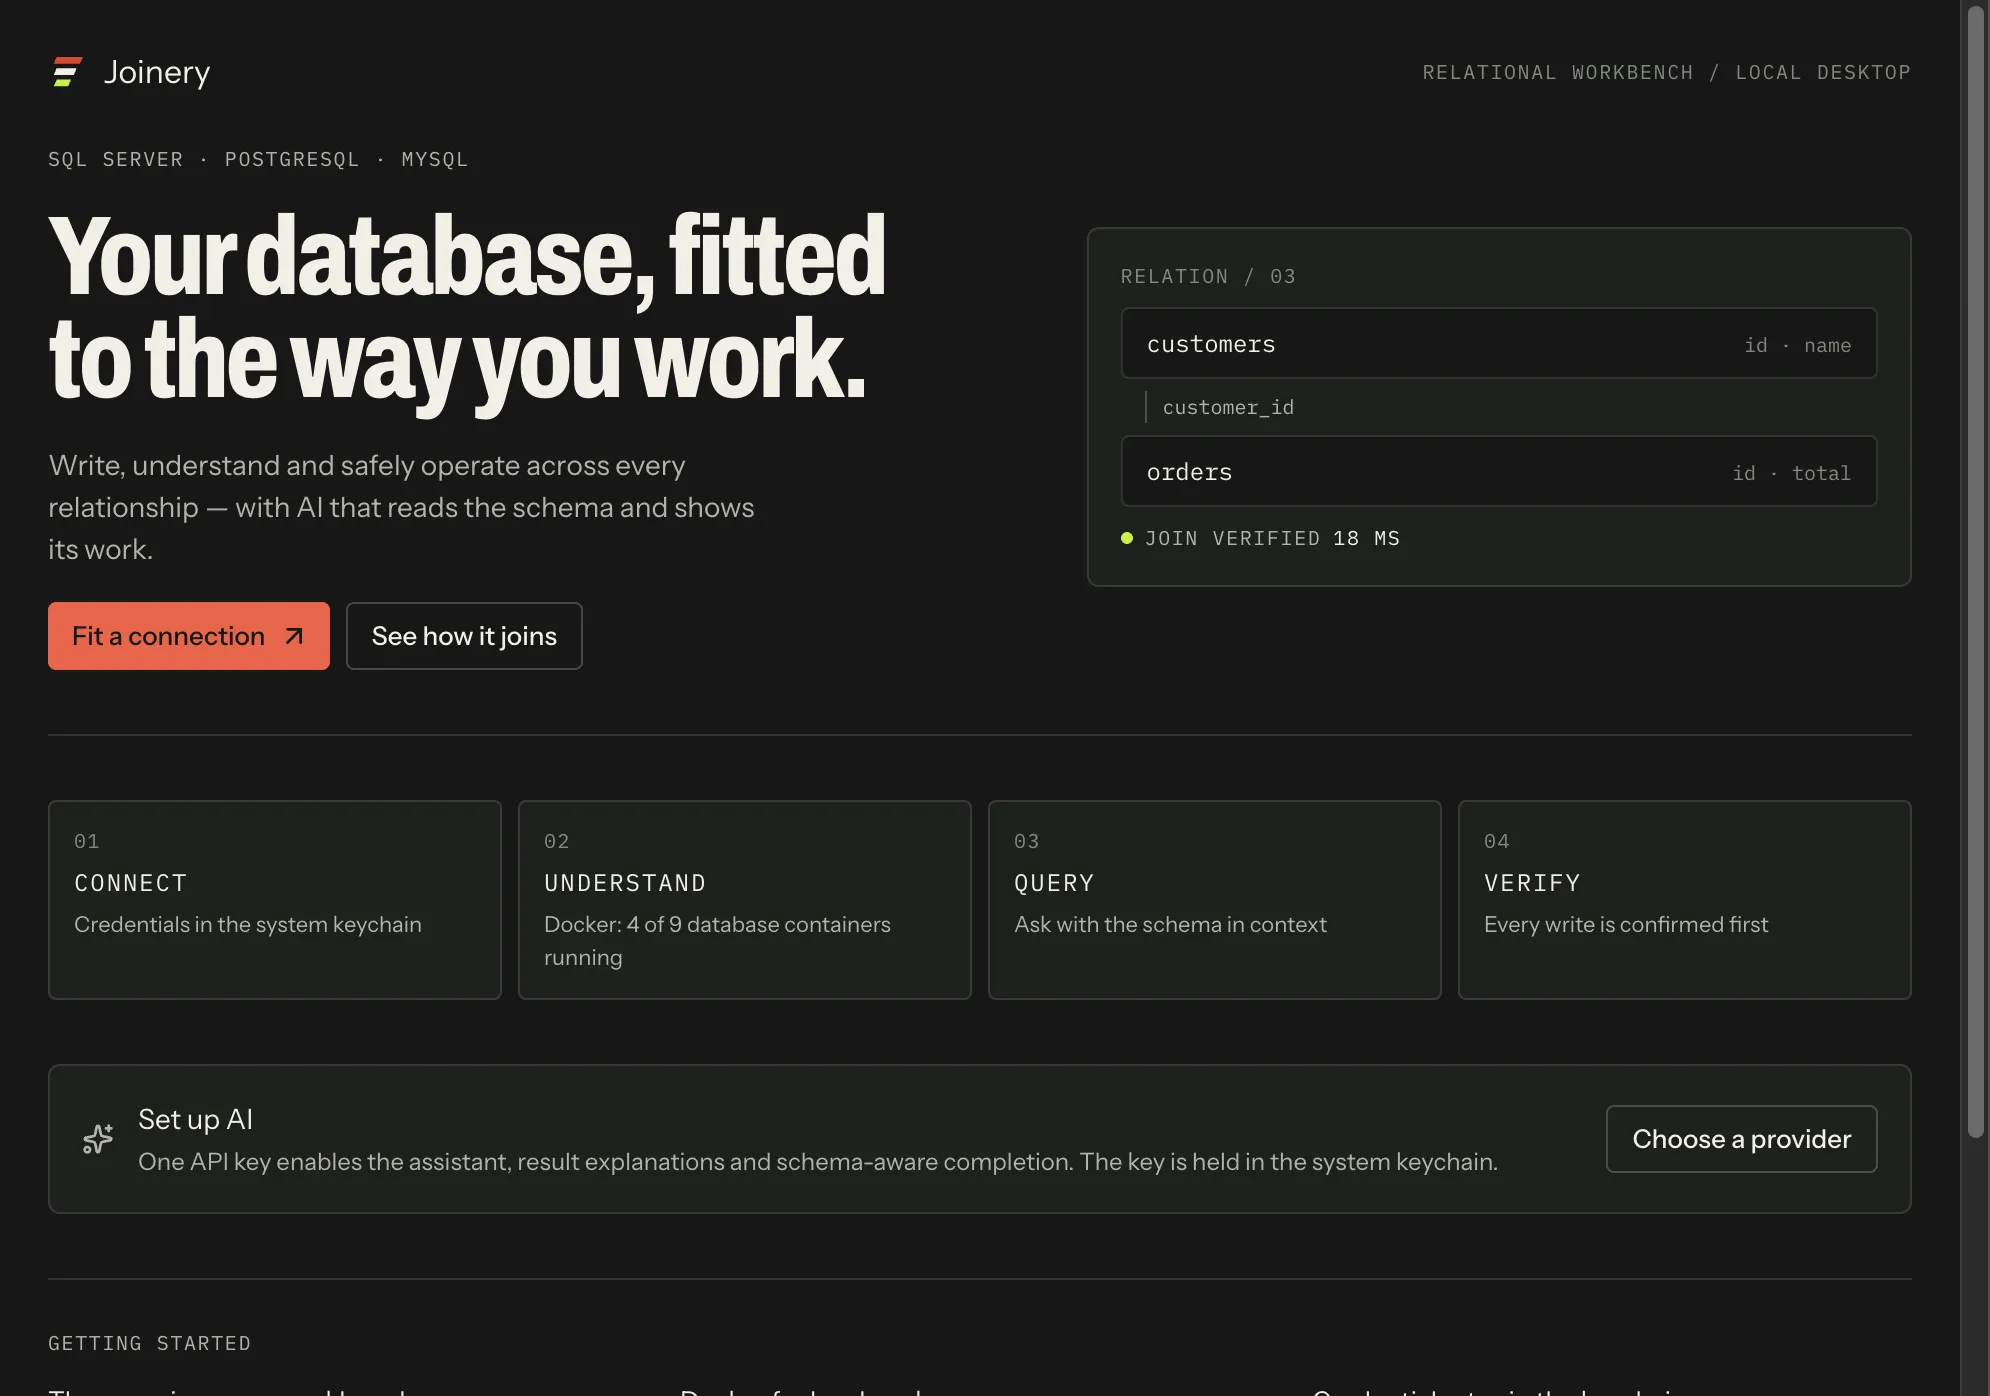
The hero. The positioning line, and two buttons:
- Fit a connection opens the connection editor. This is the main path — pick it and continue at Connect to SQL Server, PostgreSQL or MySQL.
- See how it joins starts the guided tour, described below.
Four cards, one per step of the product sequence:
| Card | What it opens |
|---|---|
| 01 Connect | The connection editor |
| 02 Understand | Find a database object — the fuzzy search over tables, views, procedures and functions |
| 03 Query | The AI assistant panel |
| 04 Verify | Settings |
The Understand card’s subtitle is live: it carries whatever Docker currently reports, from the same query that feeds the status bar’s container pip. If Docker Desktop is not running it says so.
Saved connections. Once you have saved a profile, the five most recent appear here as
one-click connects, each showing its server:port. Clicking one connects and expands that
server in the explorer.
AI. One card, in one of two states. Before any provider is configured it reads Set up AI with a Choose a provider button; once a vendor has a key it reads AI is set up with an Open the assistant button. The key is held in the system keychain — see Prerequisites.
Getting started. Three short notes: three engines in one workbench, Docker for local work, and where credentials live.
Reaching the welcome tab again
Section titled “Reaching the welcome tab again”It never disappears. View ▸ Welcome reopens it, and the command palette (⌘K, or ⇧⌘P) lists it as Show welcome tab.
The guided tour
Section titled “The guided tour”See how it joins — or Start the guided tour in the command palette — runs a spotlight over the parts of the window you will use most. There are two tours, and the first offers the second when it ends.
Around the workbench, four steps:
- The explorer — your servers, databases, tables, views and routines. Double-click an object to open it; right-click for everything else.
- The workspace — query editors, diagrams and object tabs, which dock: drag a tab to split the pane.
- Local containers — the status bar’s Docker control: start a container, stop one, or connect to it without typing a host.
- What the app actually did — the output panel, where every statement Joinery runs on your behalf is logged with its SQL. ⌘J opens it.
The assistant, two steps: the assistant toggle (⇧⌘I), and schema-aware completions in the editor.
Execute scope. The tour’s second step mentions that ⌘↩ runs the whole editor by default. See A tour of the workspace for all three execute keystrokes, what each does, and how to switch the scope to The statement at the caret instead.
Setting up AI, later
Section titled “Setting up AI, later”The assistant is optional and off until you give it a key. There are four ways in, and they all open the same dialog:
- Joinery ▸ AI Setup… in the application menu, and Edit ▸ AI Setup…
- Settings (⌘,) ▸ the AI tab
- the command palette (⌘K), Set up AI
- the welcome tab’s AI card, before a provider is configured
What is stored, and where
Section titled “What is stored, and where”Joinery does not write your preferences to the renderer’s localStorage; state that must
survive a quit is held by the main process, and secrets are held by the operating system. The
first launch therefore leaves you with an empty explorer and no keychain entries at all until
you save something.
Where this page's facts come from
| Claim | Source |
|---|---|
| The app opens on a welcome tab | packages/renderer/src/features/welcome/welcome-panel.tsx:52-69 |
| Hero buttons: “Fit a connection” (opens the connection dialog) and “See how it joins” | packages/renderer/src/features/welcome/welcome-panel.tsx:105-113, 140-155 |
| The four cards and what each dispatches | packages/renderer/src/features/welcome/welcome-panel.tsx:217-245 |
| The Docker subtitle comes from the same query as the status-bar pip | packages/renderer/src/features/welcome/welcome-panel.tsx:281-296 |
Saved connections: five most recent, server:port, connect then expand |
packages/renderer/src/features/welcome/welcome-panel.tsx:50, 308-354 |
| The AI card’s two states and their buttons | packages/renderer/src/features/welcome/welcome-panel.tsx:371-417 |
| The three “Getting started” notes | packages/renderer/src/features/welcome/welcome-panel.tsx:421-434 |
| Show welcome tab is a command; View ▸ Welcome is a menu item | packages/renderer/src/commands/catalogue.ts:517-523, packages/main/src/menu.ts:326 |
| The command palette is ⌘K or ⇧⌘P | packages/renderer/src/features/command-palette/command-palette.tsx:79-90 |
| Two tours, the workbench one chaining to the AI one, and every step’s text | packages/renderer/src/features/onboarding/tours.ts:32-97 |
| Start the guided tour is in the palette | packages/renderer/src/commands/catalogue.ts:596-601 |
| ⌘J opens the output panel | packages/renderer/src/commands/catalogue.ts:559-565 |
Execute scope defaults to all (the whole editor) |
packages/shared/src/types/settings.types.ts:70 |
| The four AI-setup entry points | packages/main/src/menu.ts:32-38, 197, packages/renderer/src/features/settings/settings-dialog.tsx:69-79, packages/renderer/src/commands/catalogue.ts:605-610, packages/renderer/src/features/welcome/welcome-panel.tsx:412 |
The renderer does not use localStorage for state |
packages/renderer/src/persistence/no-local-storage-writes.spec.ts |